Archive for March, 2013

Pyramid Lamp

March 24, 2013

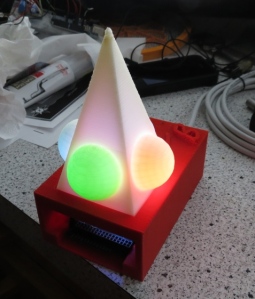
It is easy to download 3D designs and print those objects.  It is also easy to design and print small trivial objects (a lid for a cat food can).  For my talk about 3D printing, I wanted to challenge myself to create an object that was new and complex.  At one point, I imagined a four-sided white pyramid, which glowed from within with pulsing lights that changed colors and pulse patterns.  The lights would be provided by red/green/blue LEDs, which would be powered by and controlled by an Arduino computer board.

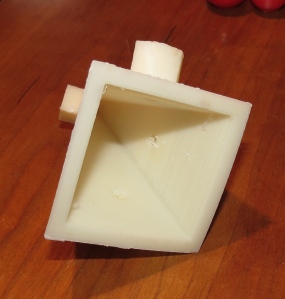
This is the first prototype of the pyramid:

IMG_2093

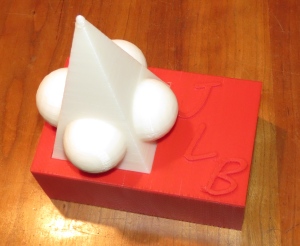
I first printed the pyramid on the right, with different geometrical shapes on each surface.  I then decided to stick with four hemispheres, and tried to fabricate the pyramid out of four triangles that I printed separately.  When the precision of the printed triangles was inadequate, I went back to printing the pyramid as a single part. The pyramid is hollow, as you can see, with small divots on the inside wall, in which I mounted the LEDs.

IMG_2102

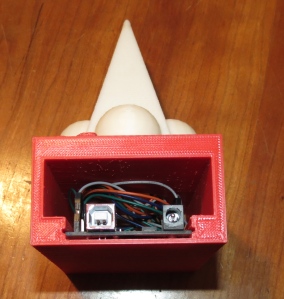
I printed a base, with a slot to hold the Arduino board, a recess on top to accept the pyramid, and a hole on the top to allow wires to enter the base of the pyramid.  Lots of custom shapes!

IMG_2094

IMG_2095

IMG_2096

This is the view from below just before final assembly:

IMG_2027a

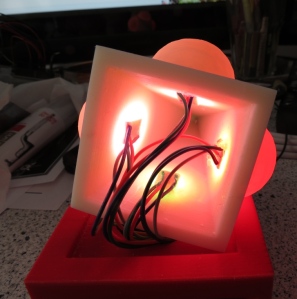
And this is what it looks like when working:

IMG_2033a

Here is a video of the working lamp:

While this project is not spectacular in terms of either complexity or beauty, it does illustrate a few principles:

1) I had a dream and was able to realize it fairly quickly

2) the objects printed would have been impossible to create in a timely, cost effective manner without the 3D printer

3) I demonstrated the integration of “art”, 3D printing, electronics, and control software

All in all, I am quite pleased with the project. People who have seen it have been captivated.  Or else I have very polite friends.

Getting Creative with 3D printing

March 23, 2013

It is amazing to be able to download a 3D model, print the part, and be able to use it, in a matter of a few hours, but creating something from scratch is more rewarding and enabling.

I downloaded and printed this red wire shield to prevent the wire bundle from rubbing up against the belts that run along the left side of the printer.  I actually “invented” the concept, but someone else came up with a much better variant, and I decided to use theirs:

IMG_2074

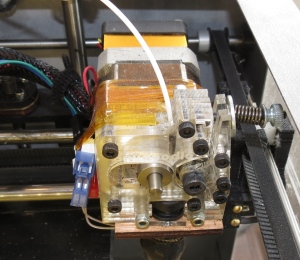
This is a stock Solidoodle extruder assembly (very pretty but very difficult to disassemble and reassemble):

IMG_2077

And this is an alternative design that can be disassembled more quickly and easily:

IMG_2079

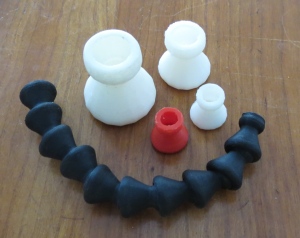
This is a hollow snake which can be twisted into any shape you like.  You can use them to pass wires for a lamp, to squirt water (they are used in fish tanks) or to draw a vacuum (they are used to vacuum up saw dust on band saws).  Since you can scale anything you print, you can now create snakes like this in any length and any diameter!

IMG_2085

One morning, I decided to create a wind turbine.  I designed it in Sketchup and printed it. I then created a mirror image of the original and printed that, also.  This was the result, all in a few hours:

IMG_1692a

When you invert one and mount them on an axle, you end up with this:

IMG_2080

The bottom one is shiny because I used an acetone vapor bath to enhance the surface finish.

I wanted to explore making smoke ring vortices using a computer to control the pulse shape, so I came up with this part, made by gluing four parts together:

IMG_1950a

The fins on the inside were primarily to support the parts while they were printed.

IMG_2086

The idea is to mount a 10″ woofer on the bottom, and then push vortices out the hole at the top.

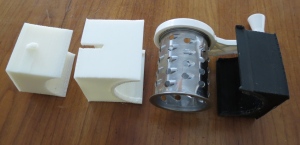
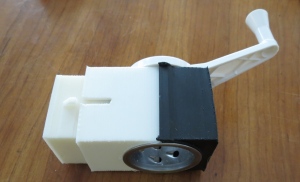
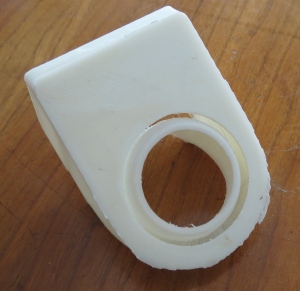
When one of my cheese graders broke, I was able to print up a replacement of my own design:

IMG_2083

IMG_2084

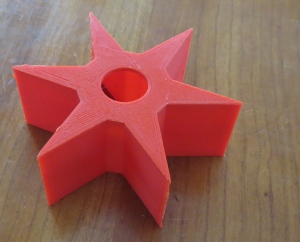
And I made a star-shaped cookie cutter, just to see if I could do it:

IMG_2082

Note that this plastic is not food safe, so I’m not sure whether I will actually use the grader and cutter.

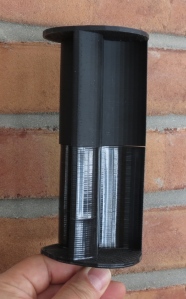
And when one reel of plastic filament arrived with a hub hole that was too small, rather than drilling the hub out, I simply printed a holder that was the right size for the reel.

Having a 3D printer is like having a drill or a screw driver or a table saw.  It is enabling. Sometimes the problems that you solve are close to trivial (lid for cat food can, rack to dry plastic zip lock bags), but sometimes the designs and prints are hugely useful.  And it is always rewarding!

3D Printing Complex Parts

March 23, 2013

While the low end 3D printers (like the ones that I have) cannot print arbitrary shapes (they need a fairly broad base to stick to the printer bed during printing), they can print shapes that would challenge normal manufacturing techniques.

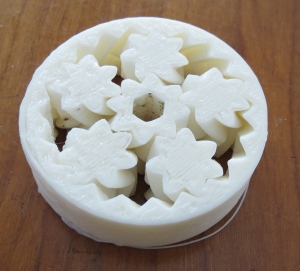
One example may be found here. This is a ring gear with 5 internal gears all surrounding a single central gear.  These gears are unusual in that the teeth are herringbone, so not only can’t this piece be disassembled, it could never have been assembled in the first place using traditional manufacturing techniques.

IMG_2070

Here are some herringbone gears on their own so you can see how they are shaped:

IMG_2066

Another example is this fan shroud. The fan is positioned to one side and blows air into a plenum.  The base of the plenum has a circular hole through which the air exits.  The point of this design is to blow fan around the printer extruder hot end, but not on the hot end.  The shape is complex and could never be injection molded without breaking it into multiple pieces, and then assembling those pieces.  With a 3D printer, you just print the part: it does not need assembly.

IMG_2067

IMG_2068

Here I show what the part looks like internally, after I sawed it in half:

IMG_2069

Two shrouds in the process of being printed:

IMG_2081

Solidoodling

March 22, 2013

I ordered a Solidoodle 3D printer this summer, and received it in November.  I managed to acquire another one along the way (long story: see my blog posting about how UPS handles packages).  The last few months have been exciting, challenging, and often frustrating.

3D printing has been an up and coming technology for over 20 years (see this for example). The news about the Solidoodle was that you could actually get a working printer for around $500. That was the key issue that had me jumping in to test the waters.

Current low-end technology suffers from inconsistencies in materials (plastic filament) and in construction.  Printers need to be set up, calibrated, and babied with some regularity.  Switch from white plastic to black, and you will spend 15 minutes fiddling in order to get good prints.  This is exciting at first, but gets old after a while. Few printers are available off the shelf, promised delivery times are often imaginary, and the learning curve for the hardware and software is tolerable but significant

Online  repositories of 3D objects are proliferating (Google Thingiverse or GrabCad).  You can find an amazing variety of free models that you can print with ease, from caps for your cat food cans to a 6-speed automatic transmission (with reverse!).  Forget about printing these things: just wander around and be amazed.

If you want to create your own 3D objects, you will need to learn how to create 3D models.  I use Sketchup, because it is free, has a huge and helpful online community, and it is more than adequate for my needs.

3D printing shops have existed for years, but rumor has it that Staples will start offering this service at their stores in the next year.  So, you can join the 3D printing revolution without buying a printer if you wish.

I’ve started a Meetup about 3D printing which will start meeting regularly soon.  And I will be giving a talk about 3D printing on Monday, March 25th at Champlain College.  Also teaching a course on 3D design at a local company in April.